- preparation
1. Assemble your materials. Successful airbrushing requires more than a few items. Check out “Things You’ll Need” below and make sure you’re prepared. Set the hot press board up on the easel or draft table, fill the bucket with water, and lay out your other tools so that they are easily accessible.
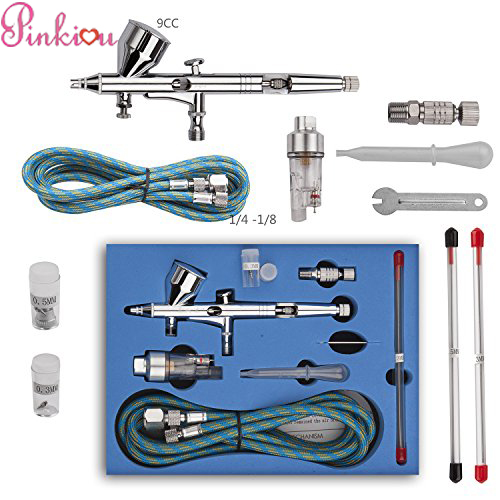
2. Know your tools. Successful airbrushing requires knowledge of how each component of the airbrushing system contributes to your desired effect.
Airbrushes come in two types: single-action and double-action. Double-action will offer greater control whereas a single-action has less moving parts and is easier to clean.
The nozzle is the part of the airbrush where the needle rests. You may wish to use different needles depending on the project.
Your air source is what supplies the air pressure needed for the airbrush to properly spray. Most art projects will require an air source that can deliver 100 P.S.I. at a constant rate. Consult a professional to choose the proper air source for your project.
3.Prepare your paint. Using the airbrush bowls or jars from your set, mix your acrylic paint with a little bit of water, such that it has an inky consistency. (If you’re using inks, you generally won’t need to dilute them.) Remember, you can always add more water but you can’t take it back out – add only a few drops at a time. Developing the right consistency can take practice.
Each project will require different paints. Consider the surface you are painting and adjust accordingly. For example, textile painting will need a paint that is soft and flexible that won’t crack after being worn or washed. Conversely, a harder, less pliable paint would be better suited for airbrushing onto a metal surface.
4.Test your paint. Adjust the needle cap on the airbrush so that the needle does not quite touch the cap, leaving just enough room for air to escape. Try spraying your paint on scratch paper to check the consistency, and practice using the lever and button on your airbrush. For the smoothest effect, keep the airbrush about 20 cm (8 inches) away from the surface.
5.Practice controlling atomisation. Atomisation refers to how finely the paint particles are sprayed. Higher pressure will create a finer atomization of paint.
Paint type and viscosity will affect atomization. Experiment with different paints and consistencies to find your desired effect.
For precision spraying, a finer airbrush needle and low-viscosity paint will be needed. Use low air pressure for this task (15-40 P.S.I.)
6.Practice cleaning the airbrush. Detach the airbrush bowls or jars, and immerse the airbrush in the bucket. Move air through it to wash out paint. This will prevent your colors from mixing in the airbrush. Then, blow water out of the airbrush by directing it at a rag or piece of scratch paper.
- Begin Airbrushing-Pinkiou
-
Sketch your drawing. Sketch out a light outline of your work on the hot press board using a pencil. Use the eraser to eliminate any stray lines, and try to lighten the ones you need as much as possible. Take a step back and check to see if your sketch resembles what you have in mind.Start working on your painting. As you paint, go one color at a time and try to build from the bottom layer up. Generally, you’ll want to move from light to dark colors. Fill in general areas first.
- Mask off areas you don’t wish to paint. Apply a frisket (a plastic sheet with adhesive backing) to your painting. Using the craft knife, cut around the area you wish to cover and remove the extra frisket. Peel the frisket off the covered area when you’re finished. You can also use tape and cut-out pieces of copy paper to achieve sharp, clean edges.
- Finish with a fine needle to create details. As you’ve already learned, you will need to lower air pressure to 15-40 P.S.I. for this task.
- Seal the painting. When you’re done with the artwork, spray a fixative over the paint to seal it in.
Stand 3 to 4 feet (0.9 to 1.2 m) away and spray using continuous horizontal strokes. Be careful not to overspray.
Let dry and then apply second coat if desired using vertical strokes.


